When I make pull requests for user interface changes, I include screenshots so everyone else involved in the product can see what I see. It’s especially helpful for designers to quickly compare their mockups with the final result. Folks have asked me if I use a particular program to create them — I don’t! It’s a fairly manual process, which I’ve now automated to make life easier. Read on to learn how to create screenshot images with a single terminal command.
The Old Way
Prior to automating the process, I’d been copying and pasting screenshots onto template images to make the composite images. Over the years, I’ve developed a method that makes it relatively quick, stockpiling template images based on the desired screenshot image layout (e.g., 2×1, 2×2, 2×6, etc.). After creating a template layout, I copied, pasted, and positioned the screenshots onto the template. Typical templates (e.g., 2×1 or 2×2) don’t take very long; larger templates like 4×5 can take a little while since they require copying, pasting, and positioning 20 screenshots.
The New Way
I decided to write a Bash script and attempt to do everything I do manually with one command. Now, what usually took minutes to do takes seconds. And it’s user-friendly enough to share, in case anyone else would like to give it a (screen)shot.
The screenshots.sh script uses multiple options to perform a series of concatenations and create a single ImageMagick command. All options are required except -f. The breakdown of each option and its purpose follows:
| -f | font of header text, Roboto.ttf by default, optional |
| -l | layout of output image, integers in columns:rows format |
| -o | output image, file name with optional path without spaces |
| -s | screenshot image, file name with optional path without spaces |
| -t | text of column header, string without spaces |
Both the -s and -t options are meant to be used multiple times when running the script (i.e., one -s for each screenshot and one -t for each text label). Basic error handling ensures that the number of screenshots and text labels input match the expected layout.
The order of the screenshot arguments determine how they will be inserted into the output image. The first screenshot image will be in the first column and first row. The second screenshot image will be in the second column and first row if there’s only one row, or the first column and second row if there are multiple rows. In other words, the screenshot images fill the first column before moving on to the next one, from left to right. The text labels do the same, but there’s only one row of headers, so the text labels aren’t inserted anywhere except the first row from left to right. The script detects the dimensions of the first screenshot image and creates the output image based on that. Therefore, it should work for any device size (i.e., phone or tablet) and any orientation (i.e., portrait or landscape). The only caveat is that the screenshots must be the same size with the same dimensions.
The compiled command run at the end of the script uses the magick command, which means ImageMagick needs to be installed on the system (I used ImageMagick 7.0.9-2 Q16 x86_64 2019-10-31). You’ll also need to specify a font to use for the header text labels. I use Roboto; you can use whatever you like as long as the OTF or TTF file is in the same directory as the screenshots.sh script and the FONT constant is updated. You can also specify any font shown by the magick identify -list font command with the -f option if you prefer to use a built-in font.
In Action
Here are a couple of example uses with explanations:
./screenshots.sh -l 2:1 -f TimesNewRoman -o output.png -t Text1 -t Text2 -s screenshot_01.png -s screenshot_02.pngThis command will create the output.png file, which will have two columns and one row with the first column containing the “Text1” header and the screenshot_01.png image, and the second column containing the “Text2” header and the screenshot_02.png image. The headers will use Times New Roman font. All files are in the same directory as screenshots.sh. The output.png image looks like this:

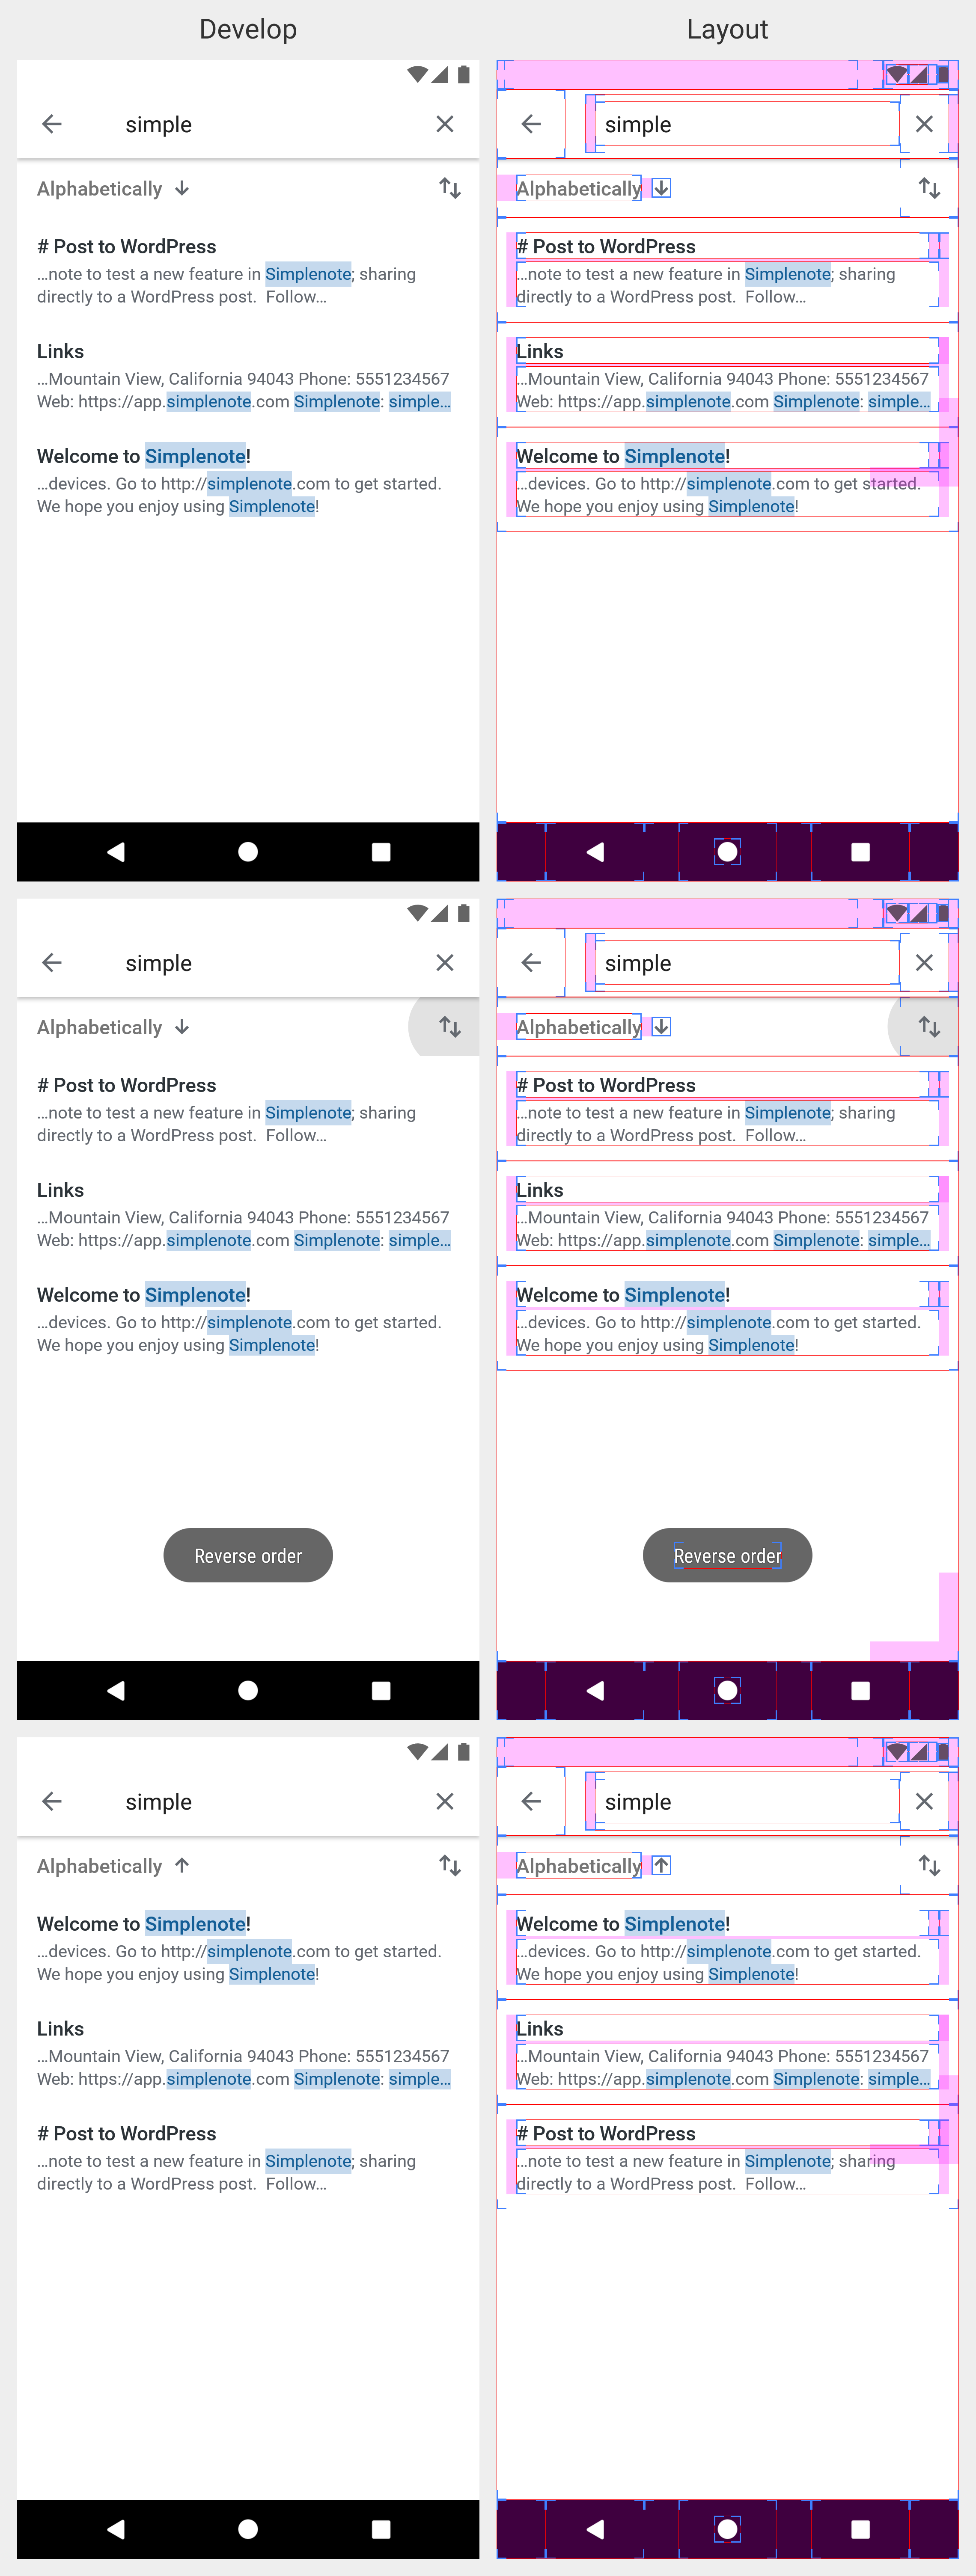
./screenshots.sh -l 2:3 -o /Users/Tyler/Documents/842_add_sorting_results_search.png -t Develop -t Layout -s ~/Downloads/Screenshot_1573434041.png -s ~/Downloads/Screenshot_1573434048.png -s ~/Downloads/Screenshot_1573434052.png -s ~/Downloads/Screenshot_1573434056.png -s ~/Downloads/Screenshot_1573434061.png -s ~/Downloads/Screenshot_1573434071.pngThe command above creates the 842_add_sorting_results_search.png file, which will have two columns and three rows, with the first column containing the “Develop” header and the Screenshot_1573434041.png/Screenshot_1573434041.png/Screenshot_1573434041.png images and the second column containing the “Layout” header and the Screenshot_1573434056.png/Screenshot_1573434061.png/Screenshot_1573434071.png images. The headers will use the default Roboto font. The screenshot files are in the ~/Downloads directory and the 842_add_sorting_results_search.png file will be saved in the /Users/Tyler/Documents directory. The 842_add_sorting_results_search.png image is shown below.

In Summary
Is this the best possible script? Probably not; it doesn’t use the latest and greatest programming language and could be optimized. But does it serve its purpose, to automate a part of my everyday life, allow me to work more efficiently, and share a helpful tool with my colleagues? Yes! It accomplishes those objectives and that’s good enough for me.
(Oh, and it’s licensed under GPLv2 of course. So you can take it and do whatever you want with it. But if you change it, please share!)
